|
|
| Line 1: |
Line 1: |
| ============================================================
| |
| OPTION 1 — Tabber (if the Tabber extension is installed)
| |
| This is the cleanest "pick which to view" UI.
| |
| ============================================================
| |
|
| |
| == Lightforge Loot Crate == | | == Lightforge Loot Crate == |
|
| |
|
| <tabber>
| | Click an item to view it: |
| Wishland Wonder=
| |
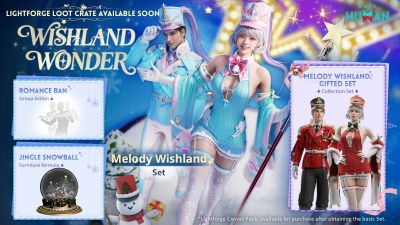
| [[File:Wishland Wonder.jpg|300px]]
| |
| | |
| ''Description of Wishland Wonder goes here.''
| |
| |-|
| |
| Item Two=
| |
| [[File:Item Two.jpg|300px]]
| |
| | |
| ''Description of Item Two.''
| |
| |-|
| |
| Item Three=
| |
| [[File:Item Three.jpg|300px]]
| |
| | |
| ''Description of Item Three.''
| |
| </tabber>
| |
| | |
| | |
| ============================================================
| |
| OPTION 2 — Native collapsible dropdown (always works in MediaWiki, no extension needed)
| |
| Click the header to expand; each item shows its image inline. | |
| ============================================================
| |
| | |
| {| class="mw-collapsible mw-collapsed" style="width:400px; border:2px solid #e94560;"
| |
| ! style="background:linear-gradient(90deg,#e94560,#f39c12); color:#fff; padding:8px;" | Lightforge Loot Crate
| |
| |-
| |
| | style="padding:8px;" |
| |
| * [[File:Wishland Wonder.jpg|48px]] '''Wishland Wonder'''
| |
| * [[File:Item Two.jpg|48px]] '''Item Two'''
| |
| * [[File:Item Three.jpg|48px]] '''Item Three'''
| |
| |}
| |
|
| |
|
| | | <div class="mw-customtoggle-wishland" style="cursor:pointer; padding:8px 14px; background:#e94560; color:#fff; display:inline-block; border-radius:4px; margin:4px; font-weight:bold;">Wishland Wonder</div> |
| ============================================================
| |
| OPTION 3 — Custom toggle "picker" (one button per item, each reveals its own block)
| |
| Acts most like a true dropdown selector.
| |
| ============================================================
| |
| | |
| <div class="mw-customtoggle-wishland" style="cursor:pointer; padding:6px 12px; background:#e94560; color:#fff; display:inline-block; border-radius:4px;">Wishland Wonder</div> | |
| <div class="mw-customtoggle-itemtwo" style="cursor:pointer; padding:6px 12px; background:#e94560; color:#fff; display:inline-block; border-radius:4px;">Item Two</div>
| |
| <div class="mw-customtoggle-itemthree" style="cursor:pointer; padding:6px 12px; background:#e94560; color:#fff; display:inline-block; border-radius:4px;">Item Three</div>
| |
|
| |
|
| <div class="mw-collapsible mw-collapsed" id="mw-customcollapsible-wishland"> | | <div class="mw-collapsible mw-collapsed" id="mw-customcollapsible-wishland"> |
| [[File:Wishland Wonder.jpg|300px]] | | [[File:Wishland Wonder.jpg|400px]] |
| ''Wishland Wonder description.''
| |
| </div>
| |
| | |
| <div class="mw-collapsible mw-collapsed" id="mw-customcollapsible-itemtwo">
| |
| [[File:Item Two.jpg|300px]]
| |
| ''Item Two description.''
| |
| </div>
| |
|
| |
|
| <div class="mw-collapsible mw-collapsed" id="mw-customcollapsible-itemthree">
| | ''Wishland Wonder description goes here.'' |
| [[File:Item Three.jpg|300px]]
| |
| ''Item Three description.'' | |
| </div> | | </div> |
|
| |
|
| |
| ============================================================
| |
| NOTES
| |
| ============================================================
| |
|
| |
| - Paste into the SOURCE editor (not Visual editor), or it may mangle the markup.
| |
| - Image names are case-sensitive and must match the uploaded filename exactly,
| |
| including spaces (MediaWiki converts spaces to underscores automatically).
| |
| - "Loot" vs "Look" — your page title says "Loot Crate" but you typed "Look Crate".
| |
| I've used "Loot" in the markup since that matches your page. Change if needed.
| |
| - If you don't know whether Tabber is installed, try Option 1 first — if the tabs
| |
| don't render, fall back to Option 2 or 3.
| |
Lightforge Loot Crate
Click an item to view it:
Wishland Wonder
Wishland Wonder description goes here.
